How to Maintain Your Water Heater: A Complete Guide
This often-overlooked appliance plays a vital role in your daily comfort, and neglecting your water heater can lead to unexpected breakdowns, costly repairs, or even safety hazards. We rely on our water heaters for so much, so learning how to maintain your water heater can extend its lifespan and save headaches. With a bit of effort, you can keep the hot water flowing and avoid those dreaded cold showers.
Table Of Contents:
- Why Water Heater Maintenance Matters
- Essential Water Heater Maintenance Tasks
- FAQs about how to maintain your water heater
- Conclusion
Why Water Heater Maintenance Matters
Just like any other appliance in your home, your water heater needs regular attention to function at its best. Ignoring routine maintenance can result in:
- Reduced Efficiency: Sediment buildup inside the tank acts as insulation, forcing your heater to work harder and consume more energy to heat the water.
- Premature Failure: Corrosion, sediment, and lack of maintenance can shorten the lifespan of your water heater, leading to an unexpected replacement cost.
- Inconsistent Water Temperature: Sediment accumulation can affect the heating element’s performance, resulting in fluctuating water temperatures.
- Safety Issues: Neglected gas water heaters might pose a risk of carbon monoxide leaks, while a malfunctioning pressure relief valve can lead to dangerous pressure buildup inside the tank.
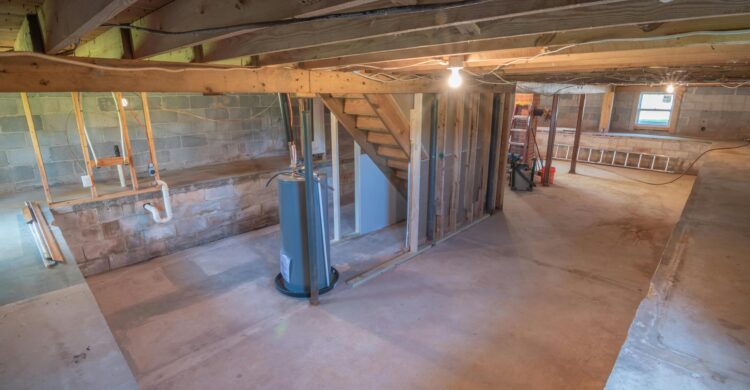
Essential Water Heater Maintenance Tasks
Hot water heaters on average last 8 to 12 years and with proper maintenance, some can last up to 20 years. Both gas and electric water heaters have similar standard maintenance efforts that should be completed on a frequent basis.
Now that you understand the importance of water heater upkeep, let’s explore the key maintenance tasks that every homeowner can tackle. Implementing these steps can significantly improve the efficiency, lifespan, and safety of your water heater.
1. Test the Temperature and Pressure Relief (TPR) Valve
Think of the TPR valve as your water heater’s safety net. It prevents dangerous pressure buildup inside the tank. If the pressure or temperature gets too high, the valve opens, releasing water to relieve the pressure and avoid potential explosions.
Maintaining this critical component can significantly impact its performance. This crucial safety check involves:
- Turn off the power: For electric heaters, flip the circuit breaker. For gas heaters, turn the gas control valve to the “off” position.
- Find your TPR Valve: This valve typically sits on top or the side of your water heater and has a discharge pipe leading to the floor or outdoors.
- Prepare for Discharge: Place a bucket under the discharge pipe to catch any water that might come out.
- Open the Valve: Carefully lift the TPR valve’s lever for a few seconds and listen for a hissing sound. This indicates the valve is working properly.
- Check for Leaks: After closing the valve, ensure no water drips from the valve or discharge pipe. If you notice any leaks, it’s time to call a plumber for a replacement.
2. Flush the Water Heater Tank
Over time, minerals and sediment from your water supply naturally build up at the bottom of the tank. This buildup reduces heating efficiency, potentially leading to costly repairs or even shortening the appliance’s lifespan. It’s like trying to heat water in a pot with a layer of sand at the bottom – it just takes longer and uses more energy.
That’s why regular flushing is important. Experts, like Lance Marques, HVAC contractor at Swezey Fuel Co. suggest that routinely flushing the tank of sediment can greatly enhance its operating efficiency and lifespan. They recommend aiming to flush your water heater annually, or even more frequently if you live in an area with hard water.
Here’s how you can tackle this important task:
- Gather Your Supplies: You’ll need a garden hose, a bucket, and work gloves.
- Safety First: Turn off the power or gas supply to your water heater. It’s crucial to prevent any accidents while working on your water heater. Also, close the cold water supply valve feeding into the tank.
- Connect and Vent: Attach a garden hose to the drain valve at the bottom of the tank. Route the other end of the hose to a safe drain location or outdoors, away from the house’s foundation. Next, open a hot water tap inside the house. This allows air to enter the system and helps the tank drain more efficiently.
- Open and Drain: Carefully open the drain valve, allowing the water to flow through the hose and into your chosen drainage point. Initially, you’ll notice murky or rusty water due to the sediment.
- Flushing Process: Continue draining until the water runs clear. Depending on the level of sediment, you might need to repeat this draining and refilling process several times. Remember, we’re aiming for crystal clear water, a sign of a clean tank.
- Finishing Touches: Once the water is clear, close the drain valve, detach the hose, and open the cold water supply valve. Wait for the tank to refill (you’ll hear the air being purged from the hot water tap). Now you can turn the power or gas back on to the unit.
3. Inspect the Anode Rod
The anode rod, sometimes called a “sacrificial anode”, is a crucial but often forgotten hero in your water heater tank’s battle against corrosion. This metal rod, typically made of magnesium or aluminum, is designed to corrode instead of your tank’s lining, effectively sacrificing itself to extend your heater’s lifespan.
Over time, the anode rod degrades, eventually losing its ability to protect the tank from rust and corrosion. By checking and replacing the anode rod as needed, you add years to your water heater’s life.
Here’s how to do it:
- Access the Rod: For this task, you’ll need a socket wrench. First, turn off the power or gas supply and partially drain the tank following the same steps we outlined in the flushing process.
- Locate the Rod: It’s typically located beneath a plastic cap on top of the water heater. Some newer models have the anode rod at the tank’s top. Once you’ve located and accessed your anode rod, you can assess its condition and decide if replacement is necessary. An old, heavily corroded rod looks thin and flaky, resembling a well-used chew toy.
- Assess and Replace: If you see heavy corrosion or the rod has less than half an inch of material remaining, it’s time for a replacement. If a replacement is necessary, ensure you purchase the correct type and size for your water heater model. You can typically find these rods at hardware stores.
4. Check and Adjust the Water Temperature
Finding that perfect water temperature setting for your water heater is a balancing act—striking that sweet spot between preventing scalding accidents and making sure you don’t run out of hot water during your morning shower. The ideal water temperature for your water heater is a subject often debated. While most manufacturers set the default at 140°F, you can often lower this setting for energy efficiency and to prevent accidental burns, particularly with young children at home.
The Government of Canada underscores the importance of a safe water temperature, especially considering the delicate skin of children. It states that “Hot water can be extremely dangerous and can burn a child’s skin in a quarter of the time it takes an adult skin to burn”. To mitigate this risk, they recommend a lower temperature of 120°F (49°C). Not only does this setting protect your loved ones, but it also contributes to energy conservation.
5. Other Crucial Maintenance Tips
- Insulate Pipes: Insulating the hot and cold water pipes connected to your water heater, particularly in unheated areas, helps retain heat and can boost efficiency. Use foam pipe insulation for this task.
- Check for Leaks Regularly: Be on the lookout for any signs of water around your water heater. Small leaks can quickly worsen, so addressing them promptly can prevent costly damage.
- Install a Water Heater Blanket: If you have an older model water heater, especially one in a cold or unheated space, consider wrapping it in a specially designed insulating blanket to reduce standby heat loss and increase energy efficiency.
- Schedule Professional Inspections: While these DIY tasks can significantly enhance your water heater’s lifespan, having a qualified plumber inspect your unit every few years is advisable.
FAQs about how to maintain your water heater
What is proper maintenance for a water heater?
Proper water heater maintenance entails tasks such as testing the TPR valve, flushing the tank, inspecting the anode rod, adjusting water temperature, insulating pipes, and checking for leaks. These preventative measures can help your water heater run efficiently and last longer.
How often should I flush my water heater?
Experts recommend flushing your water heater tank at least once a year can help remove sediment buildup. This frequency may need to increase depending on your water hardness. For instance, areas with hard water, known for its high mineral content, might necessitate more frequent flushing, perhaps twice a year, to combat mineral buildup.
What happens if you don’t flush your water heater?
Failure to flush your water heater allows sediment to accumulate. This reduces heating efficiency, leading to higher energy bills and potentially causing premature component failure. You might also experience fluctuating water temperatures, reduced hot water output, and, in some cases, an increased risk of leaks or tank damage.
How to maintain a hot water heating system?
Similar to standard water heaters, a hot water heating system necessitates regular maintenance for optimal performance. Testing the pressure relief valve, checking the expansion tank pressure, and bleeding radiators are key tasks for this type of system. Scheduling regular professional maintenance by a qualified technician helps spot potential problems and ensures efficient operation throughout the heating season. Remember, these steps contribute to your home’s heating efficiency and your overall comfort, especially during those colder months.
Is maintaining a tankless water heater different?
Tankless water heaters are different than traditional water heaters as the equipment used is different. For tankless water heaters, there are a few simple maintenance items:
- Clean the Exterior: Keep the exterior of your tankless water heater clean to prevent dirt, dust and other debris from getting into the internal components of the unit. This can be as simple as wiping the tank down with a soft cloth or even vacuuming around the tank to remove dust.
- Adjusting the Temperature Settings: Lowering the temperature to 120 degrees farenheit to reduce energy costs and put less strain on the system.
- Filter Cleaning and Replacement: Ensuring the air intake filter is replaced as necessary and the water inlet filter is cleaned every few months is critical to long term efficiency. Both can put strain on the system which can lead to higher energy costs and wear on the system.
- Descaling:
Tankless water heaters should also be flushed frequently to wash out any debris or mineral buildup that could be in the unit. Make sure to look at the instructions for your individual water heater to ensure you know how to do this as routine maintenance.
Conclusion
Now you are familiar with essential aspects of how to maintain your water heater. These actions, coupled with periodic checks for leaks and a visual inspection of the tank, go a long way in extending your water heater’s lifespan, keeping the hot water flowing and maintaining the overall safety of your home. Implementing these simple maintenance tips will help you save money in the long run.
Take Action Against Hard Water Today
